Anti-pollution devices of varying degrees of complexity are fitted to engines to reduce vehicle pollution.
Exhaust gas recirculation, one of the processes used, is widely controversial among professionals. Indeed, its particularity is that it clogs up quickly, leading to major malfunctions. Often the curative solution is to dismantle the EGR valve.
Here is a step-by-step guide on how to successfully remove an EGR valve.
Role of the EGR valve
The EGR (Exhaust Gas Recirculation) valve is an anti-pollution device. It is mounted:
– on HDI (high-pressure direct injection) diesel vehicles;
– on new generation direct injection gasoline engines.
Its function is to limit nitrogen oxide (NOx) emissions during combustion at very high temperatures (this is when NOx is formed):
– the valve replenishes the combustion chambers with exhaust gases (burnt gases);
– This disturbs the combustion and therefore reduces its temperature and NOx emissions.
EGR valve components
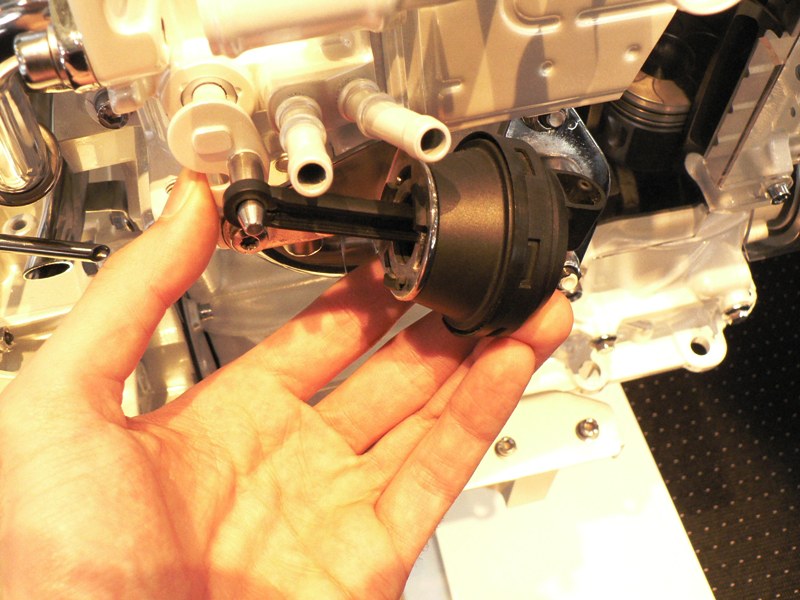
It is a housing with a spool that controls an additional passage between the exhaust and intake manifold.
The engine management module controls the valve’s opening through an electrical link: the spool moves to close and open, entirely or partially, the passage between the exhaust and the intake.
Maintenance of the EGR valve
The EGR valve poses maintenance problems.
The temperature of the exhaust gases and the combustion residues they carry, combined with the condensation phenomena in the intake system, create tar and scale that invests inside the EGR valve, the intake manifold and the combustion chambers.
As a result, the intake duct becomes partially blocked, and the EGR valve spool becomes blocked.
You can consider two solutions:
– clean the intake system with chemical treatment;
– or, for a more effective result, remove the EGR valve for cleaning or replacement.
The different types of EGR valves
As technology has evolved, several types of valves have been fitted to engines.
– Solenoid-operated EGR valve (1st generation)
◦ The spool or valve is operated by a vacuum air lung supplied by a remote solenoid valve.
◦ The latter is itself controlled by the engine management computer.
– Electrically controlled EGR valve (2nd generation)
◦ The engine management unit directly controls the valve spool with an electric motor.
◦ The valve is equipped with a position sensor, called a “recopy sensor”, which signals the ECU the position of the spool.
◦ The motor indicator lights up in a non-compliant spool position and operates in degraded mode.
Good to know: the solenoid valve and air pipes have disappeared on this type of valve.
– 3rd generation EGR valve
◦ This type of valve is equipped with a temperature exchanger housing between the coolant and the exhaust gases passing through the valve for greater efficiency and reliability.
◦ The EGR valve is also associated with an air metering throttle in the intake manifold. Its role is to adjust the pressure between the exhaust and the intake depending on the position of the valve.
Good to know: this accessory makes it possible to lower the temperature of the exhaust gases and moderate the components’ fouling.
1. Prepare the removal operation
– Take the technical review of your model with you. It is essential to know the characteristics, location and removal method of EGR valve removal.
– Locate the EGR valve.
– Depending on the type of valve, locate the electrical, pneumatic, or hydraulic connections.
– Since the valve is a component attached to the exhaust system, spray all fasteners to be removed with a de-sealer.
– If it is necessary to lift the vehicle with a jack, position one or more jack stands under the vehicle.
Good to know: The EGR valve is often difficult to access, mainly when the exhaust manifold is located at the rear of the engine. In some cases, it is necessary to remove other components to gain access (exhaust or intake manifold, battery, exhaust, starter, etc.).
2. Remove the EGR valve
Disconnect the battery
Follow the procedure for disconnecting the battery carefully. In recent models, there is a risk of a computer bug.
– Lower the driver’s window.
Good to know: this avoids the risk of unexpected locking of the windows when the battery is disconnected.
– Ensure you have the reset codes for your car radio because they are sometimes erased when the battery is disconnected.
– Open the hood, turn off the ignition, and close the doors without locking them.
– Wait an average of 5 minutes.
Good to know: this is the time needed to put all the vehicle’s ECUs into standby mode.
– Disconnect the battery (one connection is enough) and insulate the cable in a cloth or plastic bag.
Important: you will follow the reverse procedure for the connection.
Disconnect the valve and remove it

– Drain the coolant if necessary.
– Disconnect the electrical connectors from the valve.
Note: Also, disconnect any nearby connectors that may be damaged when the valve is removed.
– Disconnect the coolant connections on the valve, if present.
– For first-generation valves, disconnect the vacuum control hose
– Uncouple the metal collar from the intake manifold using a click-clamp.
– Remove the EGR valve, not dropping any seals, screws, washers, or nuts into the engine.
3. Replace the EGR valve
– Replace the EGR valve and possibly the heat exchanger clamps.
– If necessary, bleed the coolant through the bleed screw.
– After examining, cleaning, repairing or replacing the EGR valve, reinstall it following the reverse procedure.
– Install new gaskets.
Good to know: refer to the manufacturers’ recommendations which sometimes require periodic replacement of other elements (for example, the connection pipe with the intake manifold).
– If the cooling system has been drained, check that the quantities of liquid drained and replaced are equivalent.
Good to know: If not, there are probably bleed screws in the cooling system that need to be opened. See the filling procedure in the technical journal.
– Reconnect and secure the electrical connections.
4. Validate the operation
This is the point that may complicate your work: replacing an EGR valve usually requires an intervention using a diagnostic tool.
Good to know: a “learning curve” with this device is necessary for the engine management ECU to locate the valve “stops”. In other words, it must know its closed and open positions to control it.
– Connect the device to the car’s diagnostic socket.
– Once connected to the vehicle, go to the “Reset” or “Advanced Functions” menu, depending on the brand, and follow the procedure indicated.
– Take advantage of this to check for any faults in the “Read / clear faults” menu and clear them if necessary.
– Start and warm up the engine.
– Carry out a test drive to check that the engine is running smoothly: no jerking, no smoke, no exhaust leakage, etc.
– Finally, check again for defects.
Hope this post will help you dismantle the EGR valve. Remember to jot down a few words in the comments below.


